Why Your Hardwood Floors Squeak (And How the Pros Fix It)
Every Utah homeowner knows the sound: you tiptoe across the living room at midnight, and the floor announces each step like a creaky alarm system. Squeaky hardwood floors are one of the most common complaints among homeowners, and yet most people have no idea what actually causes the noise or how to make it stop for good. The frustrating part is that a squeak rarely means your floor is failing. It usually points to something far more specific, and often fixable, happening beneath the surface.
If you’ve been wondering why your hardwood floors squeak and how professionals actually fix the problem, this guide breaks down the real causes, the diagnostic process, and the repair methods that work long-term. Whether your home is brand new or a century old, the mechanics behind that irritating creak follow the same basic principles. Understanding those principles is the first step toward a quieter home.
Our Caveat
Before going further, it is worth being upfront about something: Woody’s does not send crews out to chase down squeaks. It is not a service we offer. Tracking a single noisy spot through a finished floor often means pulling up boards, opening the ceiling below, or working blind through a subfloor, and in most homes the labor involved outweighs the benefit of a quieter hallway.
What we can do is hand you the information. Most squeaks come down to shims, lubricants, and a few screws driven from the joist side. These are fixes well within reach of a confident homeowner and very inexpensive to attempt. That is what the rest of this post covers. When the job moves beyond a squeak and into a full hardwood flooring service like installation, refinishing, or replacing a floor that has reached the end of its life, that is our work, and we are glad to talk it through.
Understanding Why Your Hardwood Floors Squeak
That sharp creak under your foot isn’t random. It’s the sound of wood rubbing against wood, or wood pulling against a nail or screw. Every squeak has a mechanical cause: two surfaces are moving against each other when they shouldn’t be. The trick is figuring out which surfaces and why.
Hardwood floor squeaks generally fall into three categories: moisture-related wood movement, subfloor attachment problems, and structural joist issues. Sometimes all three contribute to the same noisy spot. A professional will consider each possibility before recommending a fix, because applying the wrong solution wastes time and money.
Fluctuations in Humidity and Seasonal Wood Expansion
Wood is hygroscopic, meaning it absorbs and releases moisture from the air. When indoor humidity rises during summer, hardwood planks swell. When winter heating dries the air out, those same planks shrink. This seasonal cycle creates gaps between boards and between the flooring and the subfloor beneath it.
Those gaps are where squeaks are born. A board that fit snugly against its neighbor in July might have a 1/16-inch gap by January. When you step on that board, it flexes downward into the gap, rubs against the adjacent plank or the nail holding it in place, and produces that familiar creak. Over several years of expansion and contraction cycles, nails can work themselves loose by fractions of an inch, making the problem progressively worse.
Homes in climates with dramatic seasonal humidity swings, like much of Utah where winter air can drop below 20% relative humidity indoors, tend to develop squeaks faster than homes in more stable environments.
Subfloor Issues and Improper Fastening Techniques
The subfloor is the structural layer beneath your hardwood, typically 3/4-inch plywood or OSB (oriented strand board) in modern construction. If the subfloor wasn’t properly fastened to the joists during construction, or if the adhesive between the subfloor and hardwood has degraded, you’ll get movement and noise.
Common subfloor problems include:
- Plywood panels that weren’t glued and screwed to the joists (nails alone tend to loosen over time)
- Subfloor seams that land between joists instead of on them, creating unsupported edges
- Warped or delaminated subfloor panels that no longer sit flat
- Inadequate spacing between subfloor panels, causing them to buckle when they expand
Improper fastening of the hardwood itself is another major culprit. If a flooring installer used too few nails, placed them at the wrong angle, or chose the wrong fastener length, the boards won’t stay tight to the subfloor. The industry standard for 3/4-inch solid hardwood is a 2-inch cleat or staple every 6 to 8 inches along each plank, driven at a 45-degree angle through the tongue. Miss that specification, and squeaks are almost guaranteed within a few years.
Structural Joist Movement and Friction
Sometimes the noise isn’t coming from the flooring at all. Floor joists, the horizontal framing members that support everything above them, can develop their own issues. A joist that has dried and shrunk since installation may pull away from the subfloor, leaving a void. When weight is applied above, the subfloor deflects into that void and bounces back, creating a squeak or pop.
Joists can also twist or crown over time, especially in older homes where lumber was less dimensionally stable. If a joist twists even slightly, the subfloor connection loosens on one side. Cross-bridging or blocking between joists can also work loose, allowing lateral movement that translates into floor noise.
You can do a quick diagnostic yourself: have someone walk across the squeaky area while you watch the floor from below (if you have basement or crawlspace access). If you can see the subfloor flexing or separating from a joist, you’ve found your problem.

Professional Solutions for Silencing Squeaky Hardwood
Professionals have several repair strategies depending on the type and severity of the problem. The right approach depends on the floor construction, and whether below-floor access is available.
Lubrication Techniques for Minor Surface Friction
For squeaks caused by two hardwood boards rubbing against each other at their edges or tongue-and-groove joints, lubrication can be a surprisingly effective fix. Pros often use powdered graphite or talcum powder, working it into the seams between boards with a soft brush. The powder reduces friction at the contact point, eliminating the noise without any fasteners or structural work.
This method works best for seasonal squeaks that appear during dry winter months and disappear in summer. It’s a temporary solution, since the powder eventually works its way out or gets compressed, but it can buy you a quiet season or two. Some professionals use a specialized dry lubricant spray designed for wood joints that lasts longer than powder alone.
A word of caution: never use liquid lubricants like WD-40 on hardwood floors. They can stain the wood, damage the finish, and attract dirt that makes the problem worse over time.
Securing Loose Boards with Top-Down Fasteners
When individual boards have pulled away from the subfloor, the most direct fix is driving them back down. Professionals use trim-head screws (sometimes called finish screws) that are thin enough to countersink into the hardwood without splitting it. The screw head is then filled with color-matched wood putty, making the repair nearly invisible.
The key is screw placement. A pro will drill a pilot hole at an angle through the face of the board, driving the screw through the hardwood and into the subfloor (and ideally into a joist for maximum holding power). Standard drywall screws are the wrong choice here: they can snap under the shear forces of foot traffic. Purpose-built floor screws with aggressive threads and a fine head are the professional standard.
For wider plank floors (5 inches and above), face-screwing is sometimes combined with a construction adhesive injected through a small drilled hole to fill the void beneath the board before the screw pulls it tight. This two-step approach prevents the board from simply flexing between fastener points.
Subfloor Reinforcement and Joist Shimming from Below
When you have access from below, the repairs get more precise and less invasive to the finished floor above. This is the preferred approach because it leaves the hardwood surface untouched.
For subfloor-to-joist gaps, wooden shims coated with construction adhesive are tapped into the space between the joist and the subfloor. The shim fills the void and the adhesive prevents it from working loose. This needs to be done carefully: driving a shim too aggressively can actually push the floor up and create a hump.
For longer spans where the subfloor has separated from a joist, pros will run a bead of construction adhesive along the joist and then pull the subfloor down with screws driven from below. A 1-1/4-inch screw is typically used so it grabs the subfloor without penetrating through the hardwood above. Measure twice here: punching a screw through a finished oak floor is an expensive mistake.
In cases where a joist itself is the problem, a sister joist (a new piece of lumber glued and bolted alongside the original) can restore structural rigidity. This is a more involved repair but solves problems that no amount of shimming can fix.
Advanced Fixes: Squeak Relief Kits and Specialized Tools
Several products on the market are designed specifically for Utah homeowners and pros dealing with stubborn floor squeaks. The most well-known is the Squeeeeek No More kit (yes, that’s how they spell it), which uses a specially designed screw and depth-control fixture. The screw drives through the carpet or hardwood, bites into the subfloor and joist, and then snaps off below the surface. It’s clever engineering for a common problem.
For hardwood floors specifically, the Counter-Snap version of this system includes a depth-control fixture that stops the screw at the right depth, and the screw head snaps off cleanly about 1/8 inch below the wood surface. The hole is then filled with putty. Professionals report good results with these kits, especially in situations where below-floor access isn’t available.
Another specialized approach involves using a floor jack or support post from below to press the subfloor back up against a separated joist while adhesive and screws are applied. This is common in older homes with full basements where joists have sagged or twisted over decades.

Preventing Future Floor Squeaks with Proper Maintenance
Fixing a squeak is satisfying, but preventing the next one is smarter. Most preventive measures come down to controlling the environment your floor lives in and catching small problems before they become noisy ones.
Squeaks, Repairs, and Your Next Project
If your floors are talking back every time you cross the room, most of the fixes outlined above are within reach of a confident homeowner. Shims, lubricants, and joist-side screws solve a large share of squeaks for very little money.
It is worth being upfront about the rest. Chasing a persistent squeak through a finished floor often means pulling up boards, opening ceilings below, or working blind through a subfloor. In many older homes, the labor and cost involved outweigh the benefit of a quieter hallway. That is a conversation worth having before anyone starts removing flooring.
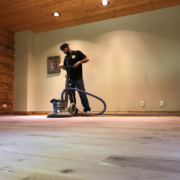
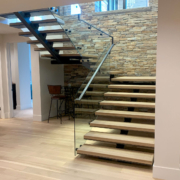
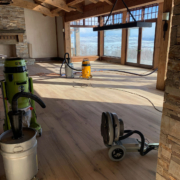
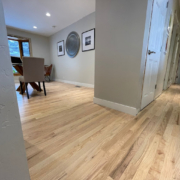
Where Woody’s Hardwood Flooring can help is on the larger work. We install, sand, and refinish hardwood for homeowners across Utah. When we are already on site for a project, we address any squeaks we can resolve as part of the job, and the subfloor is accessible during installation and refinishing anyway. That is the point where a squeak is straightforward and affordable to correct.
If you are considering new flooring, a refinish, or a repair to a damaged area, request your free quote today and we will walk you through the options for your home.